Slaughtering Rabbits
Slaughtering rabbits refers to the process of removing the rabbit pelt, cleaning the rabbit carcass and cutting the rabbit meat (lapin) into pieces for dinner. Here is the best way we've found to do all that.
(Do you still need to kill the rabbit? Go to Killing Rabbits for directions on how best to kill it.)
Equipment:
Set yourself up for the slaughtering process with these tools:
--Very sharp skinning knife
--Knife sharpener and steel or ceramic honing rod
--Heavy shears or loppers, such as sold in the garden
department
--5-gallon bucket for water. Fill it three-quarters full. Slaughtering rabbits can get messy - you'll want a lot of water for
cleaning hands and knife. Set the bucket on a chair, step stool or bench to
raise it to a comfortable working level. Top it off with boiling water from the teakettle so the temperature is not ice-cold.
--A large round or square, possibly plastic, container, such
as a dish pan or 5-gallon bucket, for collecting the innards as they drop. Place this at the foot of or underneath the hanging rabbit carcass. Depending on the size of the container and
the number of rabbits to butcher, you may need to empty this container now and
again into a large plastic garbage bag.
--Hose with nozzle, for cleaning up the blood and mess from slaughtering rabbits.
--Heavy freezer bags or vacuum-packing
machine.
Can't go wrong with Swiss-made Victorinox:
Slaughtering Rabbits:
How to remove the pelt without damaging it
|


Another knife that will serve well for years:
Slaughtering Rabbits:
How to clean the rabbit carcass
|
1. Pinch up the abdominal lining and make a cut just below
the groin. See Picture 7. 2. Insert two fingers into the cut. Pulling
outward a bit, insert knife, blade down, between your fingers. Cut downward, sliding your fingers downward
with the knife, keeping the innards away from the edge of the blade. You only
want to cut the abdominal wall. Cut down
to the ribcage. The innards will fall outward a bit. See Pictures 8
and 9. 3. To enable the release of the rectum and large intestine from the groin, the pelvic joint must be split in two. Find the cartilaginous joint by grasping the tail with the groin region and pulling it firmly to one side. See picture 10. If it helps, you can hold the tail, groin and left thigh in one hand. The pelvic joint is made of cartilage that joins both sides of the pelvis at the midline under the groin organs. It is a short white line less than an inch long; in the picture it is just under the blade edge of the knife. Place the knife blade dead center over the pelvic cartilage. With
controlled pressure on the knife blade, press
inward along the length of the joint.
The cartilage should cut fairly easily. Ideally, the blade will separate
the pelvic joint without cutting through to the rectum, which is directly under
the pelvic joint. 4. Grasp both thighs and bend them backward. This will
spread the severed pelvic joint. You will be able to see if you need to
carefully cut any other tissues alongside the colon/rectum. 5. Grasping the tail and groin once again, pull it all
forward toward you, locating a joint in the tail bone on the side toward the back. 6. Cut through this joint, severing the tail from the back bone.
Again, take care to not cut so deep as to sever the rectum. 7. This should release the tail and groin into your
hand. Pull the entire groin and tail downward. The tail and intestines will now
pull free, and you can let it dangle free with the rest of the entrails. See Picture 11. 8. Separate the innards from the liver. Everything should be
falling outward except for the stomach, which is attached to the
esophagus. Cut the stomach free of
tissues, blood vessels, and liver. If you leave it attached to the esophagus and pull
snugly, you may be able to pull the esophagus free of the neck, and the whole
works will fall into the bucket below the carcass. 9. Gather up the liver carefully in your hand and cut it
free. 10. You’ll easily locate the gallbladder, a small sac filled with a lot, or just a little, green gall. You’ll also easily spot the gallbladder duct attaching the gallbladder to the liver. Pinch the duct (not the gallbladder) between a thumb and finger and pull it free from the liver. See Pictures 12 and 13. Drop the gall bladder into the discard bucket, saving the liver. |


Very important: Once you pinch the duct and pull, you must not release your pressure on the duct until discarding it. The gall is extremely bitter, and should you lacerate the gallbladder or allow any of the bright green gall to spill, it will ruin anything it spills on. The bitter taste is next to impossible to rinse away.
Sharpen and hone your blade as you go.
Take this knife sharpener and steel with you to the rabbit processing work space:

11. Remove the kidneys along with the surrounding fat.
There’s a membrane around all that fat - with a little care, you can pull it
all out without leaving globs of fat in the carcass.
12. You’re almost done. Cut through the rib cage close to one side of the breastbone. This requires only moderate pressure on the blade. Spread the ribcage and cut the rabbit's diaphragm - the membrane covering the lungs.
13. Pull the lungs and the heart out of the chest cavity. Hopefully the trachea will come with them.
14. Pull (or cut) the heart away from the lungs.
15. Use a strong shears to cut off the front paws. See Picture 14. Finish cutting any remaining tendons with the knife.
16. Use the shears to cut the hind feet. Ideally the carcass
will continue to hang by tendons, and you can cut the last tendon loose with
the knife while holding the carcass with the other hand.
There, you now have one rabbit carcass in hand!
The whole
butchering process should take between 15 - 20 minutes, until you get really
good at it.
Besides the carcass and pelt, we save the heart and
the liver. Some folks might like the kidneys as well.
The rest of the innards can be offered to your dog or cat, if free of disease.
A one gallon freezer bag fits one medium sized processed rabbit snugly:
You're just about done slaughtering rabbits. What remains are the clean up, cutting up the carcasses, and putting away the meat harvest....
Slaughtering Rabbits:
Handling the Clean Carcasses, Organs, and Pelts
1. Soak the carcasses in a sink full of cold salted water (2
tablespoons per sink full) for about a half-hour. This removes body temperature
and helps dissipate the blood from the carcass. Rinse. Leave whole, or cut into pieces. Seal in freezer bags
what you don't intend to use immediately. Chill in refrigerator overnight, and then freeze.
2. Rinse the livers, hearts, and any other organs such as kidneys. Place in freezer bags and freeze the parts you don't intend to use immediately. If you feed a raw diet to your animals, don't forget to give your animals a heart and liver for every carcass you feed them. These organs are rich in nutrients and vitamins necessary for animal health.
3. Pay attention to the pelts you intend to use:
- Thoroughly rinse the blood out of the pelts, place the pelts on pelt stretchers and dry in a vermin-free environment.
- Or, thoroughly rinse the blood out of the pelts, and begin the tanning process by placing them into the tanning brine.
- Or, thoroughly rinse the blood out of the pelts, squeeze the extra liquid out of the pelts (without wringing), place the pelts into freezer bags and freeze until ready to tan. Freezing does not damage the pelts.
- Check our Rabbit Pelts page for tanning recipes and tanning instructions.
This Fiskars Bypass Lopper handles the bone-cutting admirably:
Slaughtering Rabbits:
How to cut up the rabbit carcass
You’ll get 8 rabbit pieces by following these directions: two front legs, two back legs, two rib sections, and two back sections.
- Separate the front limbs from the rib cage.
- Separate the hind limbs from the back
- Cut through the backstrap to separate the rib section from the back. With the meat cut, snap and break the back, dislocating it at the cut. Then it is easy to cut free.
- Bend the ribcage outward, and cut into its two sides.
- Cut the last strip - the back - in the middle. Cut the muscle and snap the back in two in order to cut through the joint.
Raising and slaughtering rabbits provides for nutritious meals to both your family and your animals. Acquire enough pelts, and you can stay warm through the winter by creating blankets, jackets, mittens, mukluks, caps, and more. Slaughtering rabbits takes you many steps forward along the path to health, self-sufficiency and survival preparedness.
Double-Value Guarantee
Our policy is to always OVER-deliver
on value,
which is why your purchase is fully covered by our
Double-Value
Guarantee.
Go ahead - take any of our e-books for a test drive. Peruse our detailed informational and educational e-books. Examine our plans for building rabbit cages, runs, or metal or PVC hutch frames. Check out the Rabbit Husbandry info e-books.
If you aren't completely satisfied that your e-book purchase is worth at least double, triple or even quadruple the price you paid, just drop us a note within 45 days, and we'll refund you the entire cost. That's our Double-Value Guarantee.
Note: When you purchase your
e-books, they will be in PDF format, so you can download them to any device that
supports PDF format. We advise making a back-up copy to a drive or cloud
account. If the books are lost, you can also purchase another copy from Raising-Rabbits.
* Affiliate Links*
As an affiliate of several companies, including Amazon.com, we earn from qualifying purchases. Your purchases from these affiliates come at no extra cost to you.
Bunny Bazaar!
Online Shopping Mall by Raising-Rabbits!

One-Stop Shop for Rabbit Swag for both Rabbits and Humans
Bunny Branola:
Immune-Boosting Rabbit Nutritional Supplement and Treat!

SIX delicious flavors - Sample packs available.
Yes! I want more info!
Yes, Buy Bunny Branola Now!
Raising Rabbits Sweatshirts, T-shirts, and Hoodies!
 |
 |
 |
Now offering classy, unisex Raising Rabbits sweatshirts and hoodies.
Available in a large assortment of colors! (We have unisex T-shirts too.)
Find these gorgeous garments in the Bunny Bazaar!
Order your own today - They make great gifts too!!
Featured Rabbitries:
Click the Rabbitry Name Links:
Canada, Quebec
MapleRidge Stables Rabbitry
Himalayan Rabbits
Arizona
Hostile Hare
Chinchillas, Cages
Illinois
Open Doors Rabbitry
Lionheads, New Zealands
Kentucky
Goshen Bunnies
Holland Lop and Mini Plush Lop
Minnesota
Lops of Love Rabbitry
Closed for Christmas vacation
New Jersey
Belle's Bunny Boutique
Holland Lops & Mini Lion Lops
North Carolina
What The Fluffle Rabbitry
New Zealands, Champagnes
Breadbox Rabbitry
Netherland Dwarfs
Pennsylvania
Happily Ever After
Mini Plush Lops, Holland Lops,
Netherland Dwarf, Lionhead,
Mini Plush Lop, & Mini Rex
Bunnies by Emma and Ellie
Holland Lop, Mini Lop, Mini Plush Lop,
Mini Rex/Holland Lop Mix
South Carolina
Jubilee Farms
Holland Lops
Subscribe to Rabbit Rhythms,
our e-newsletter !
Get rabbit news, husbandry and health tips mostly every month. It's easy - we only need your email address, then hit the 'subscribe' button. Enjoy!
Recent Articles
-
All rabbit breeds recognized in USA by American Rabbit Breeders Assoc.
Jan 02, 26 06:49 PM
 List of all rabbit breeds recognized by ARBA, along with weights, brief descriptions and link to national rabbit breed club if available
 -
About Ordering Raw Rabbit: Feeding Raw Can Be Easy
Dec 10, 25 05:10 PM
 About ordering raw rabbit: All the details and your questions answered about easily purchasing frozen raw rabbit from Raising-Rabbits.com for your dogs/cats.
 -
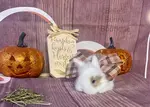
Autumn Rabbit Pictures: Autumn-Themed Rabbit Photos
Aug 25, 25 04:14 PM
 Autumn Rabbit Pictures is a delightful collection of bunny photos in various fall themes, including story lines and cute quips..

Raising-Rabbits: Home of
The Rabbit Raising Problem Solver

$22.62 - includes
- 10% off your autographed copy of Rabbit Raising Problem Solver
- All packaging, handling, and Media Mail postage costs (WA residents are subject to sales tax)
- Applies to US addresses - (sadly, Media Mail is not offered for international shipping, not even for really awesome books)
- (International shipping is available, of course, but it's out of our control how much they charge for shipping. Send us your country, city, and area code to obtain a shipping quote.)
* Affiliate Links*
As an affiliate of several companies, including Amazon.com, we earn from qualifying purchases. Your purchases from these affiliates come at no extra cost to you.

New! Comments
Have your say about what you just read! Leave me a comment in the box below.