Rabbit Cage Plans
Build Your Own All-Wire Cage
Here are free rabbit cage plans below for an all-wire rabbit cage measuring 36 inches wide by 30 inches deep. (Dimensions can be changed, of course!) The cage you build with these cage plans can serve as an indoor or outdoor rabbit cage.
But first...
- If you think you might need a little more help building this all-wire cage, like the advantage of more photos and additional detail
- Or, if you know you'll want to change the dimensions of the cage
- Or, if you'd also like the plans for our PVC or angle iron hutch frames and rabbit runs...
Consider purchasing one of our e-books.
Two Separate E-Books OR Both E-Books in One
Do you own one or a few pet rabbits?
Pet Rabbit Living Spaces
Pet Rabbit Living Spaces is our collection of exclusive and creative DIY plans for building your own luxurious rabbit cages, hutches, runs, and pens. Included are never-before published plans and designs for cages, including some that allow nearly face-to-face interactions between bunnies and their people. These plans will please you and your pet rabbits.
Pet Rabbit Living Spaces is
available as an instant-download PDF e-book. It is a hands-on, do-it-yourself manual of plans and instructions for creating a variety of rabbit homes and exercise spaces for your pet rabbits, both indoors and outside. It's a big PDF file, full of pictures and illustrations. Click the photo or go to Build Your Own Rabbit Cage to learn more!
Are you a meat rabbit breeder or a breeder of show rabbits?
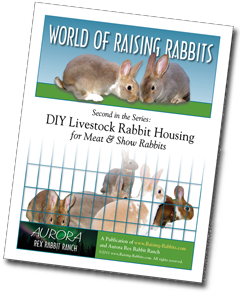
DIY Livestock Rabbit Housing
The DIY Livestock Rabbit Housing PDF e-book offers a large choice of plans for cages, hutch frames, rabbit tractors, runs, and pens, all specifically designed for homesteaders or those who are raising more than just a few rabbits for show or livestock.
Who says you can't build rabbit cages? With the right tools and materials, cage building is not complicated at all. Build it yourself and save a ton of money! These are QUALITY cages you'll be building: much much nicer and safer for your rabbits than cages cobbled together with cheap hardware cloth stapled to wooden boards.
Click the pic or this link for more information, or visit our store to purchase DIY Livestock Rabbit Housing!
Would You Like ALL our Cage and Hutch Frame Plans?
Ideal DIY Rabbit Cages
BOTH of the above e-book plans are included and available in one comprehensive PDF e-book containing ALL plans: Ideal DIY Rabbit Cages - Click the pic or this link for more info or...
Visit our store to purchase Ideal DIY Rabbit Cages!

Here are Your Free Rabbit Cage Plans!
(If you cannot find the cage wire, tools, and
j-clips that you'll need in your area, here and below are links to excellent tools and wire
which should work well for you.)
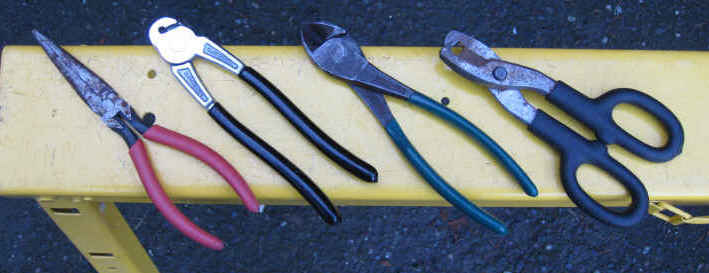 Tools needed for building the all-wire rabbit cage
Tools required are few:
- Needlenose pliers
- J clip plyers
- Wire cutters
- J clip removers
- A couple sawhorses, for ease of working (or workbench or...)
Use Flush-Cut Wire Cutters to Avoid Wire Ends that Feel Like Spears
Either of these J-Clip Pliers is Top Quality - should last 20+ years
Cage Wire Options
Materials:
- 1 inch by 2 inch by 3 feet wire - 14 gauge, approximately a 10 foot length.
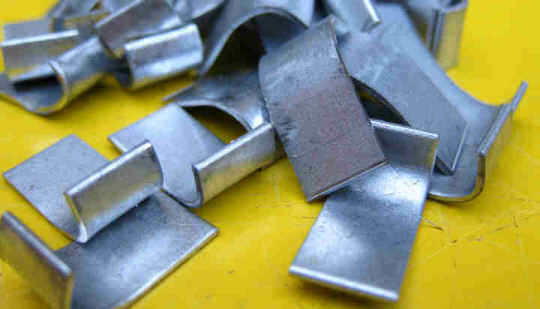 Our rabbit cage plans use J-Clips
- 1/2 inch by 1 inch by 3 feet wire - 16 gauge, 2 1/2 foot length. (14 gauge is better if you can find it...I use 16 gauge)
- 1 pound of J clips, a few are pictured (you'll probably use less than a pound)
- 1 Door latch (pictured)
J-Clips - 1 pound or 2 pounds
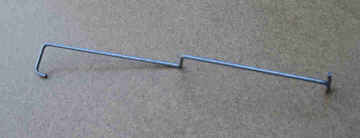 One style of cage door latch that we like
- 12" J-Feeder. See picture of finished cage. You can also use a crock for food. For a 9 pound doe and her kits, a crock would have to be large, unless you feed twice a day.
- Water crock. Or better, an automatic watering system. Edstrom makes a great system.
- Find rabbit supplies and cage building tools at our Raising-Rabbits Store.
Options for Cage Latches
Rabbit Cage Plans
1) If
you purchased 2 1/2 feet of 3 foot cage floor wire, this piece is ready
as is. If you purchased enough for several cages, then cut a 30 inch x
36 inch piece. Cut the protruding wires flush for this and all wire
pieces.
2) Cut the 1" x 2" inch wire to size:
- 1 piece: 36" x 18" for the cage front
- 1 piece: 30" x 36" for the cage top
- 2 pieces: 36" x 18" for the cage sides
- 1 piece: 24" x 18" for the cage back
- 1 piece: 13" x 14" for a door
First Note:
First: If you cut a 24 inch x 36 inch piece of wire for the back (since the roll is 36 inches tall) and then trim it to the indicated 24" x 18," you'll have a piece left over that is big enough to use for the door, with very little waste.
Second Note:
6" of cage side wire will wrap to the back on both sides, reducing the amount of wire needed for the back panel to just 24 inches.
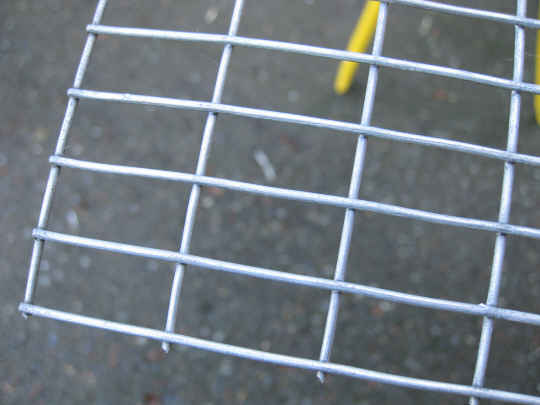
3) Set
the 30 x 36 piece of rabbit cage floor wire on your sawhorses or work
space. An important caution: you need the 1/2" wires to be on top where
the rabbits will stand, as shown on the right. This gives improved support to the rabbit's feet.
4) Bend 6" of the side panels around a 2x4 or sawhorse, so that the final lengthwise measurement of the piece is 30" x 18". The extra, still-attached 6" length will wrap around and become part of the back of the cage. We wanted rabbit cage plans that save time by not having to cut wire, and that eliminate wire waste.
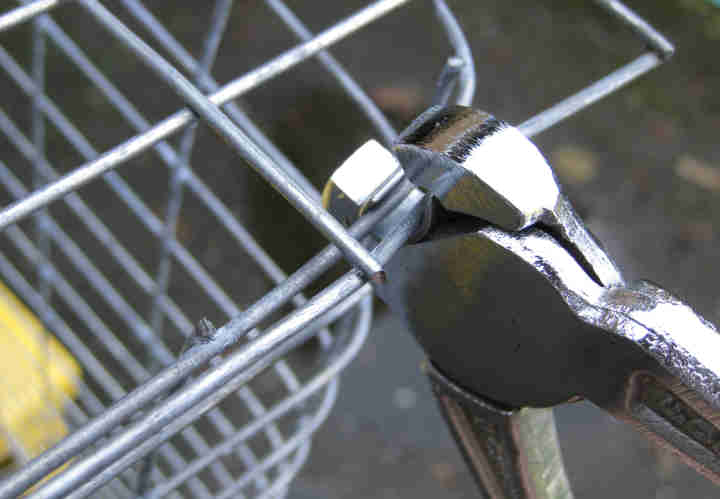
5) Attach the side panels to the floor with J-clips, as shown. You can also use hog rings if you have them, and hog ring plyers. I've always used J-clips. I attach them roughly every 2 or 3 inches.
6) Attach the back panel using J-clips. Because you've wrapped wire from the sides, the back panel is only 24 inches wide. There, you've saved money!
7) Attach the front panel using J-clips.
8) Attach the top panel using J-clips. You could substitute hog rings for the J-clips in the rabbit cage plans. In that case, you'd also need hog ring pliers.
9) Locate where you'll place the door, and cut a 12" x 12" hole in the front panel. Allow 2" of cage wire at the bottom and 4" at the top. If you're right handed, you might find it easier to reach into the cage if the door opening is placed towards the right of the cage. (Left side if left-handed.) Leave about 6", however, to the right of the door, so you can attach a water valve or a hay feeder.
10) Position the door over the opening so the 14" length is top-to-bottom and the 13" length is side-to-side. Overlap the top and bottom by 1" each. You won't need any overlap on the side you attach to, leaving 1" overlap on the side that opens. Be sure you allow at least a 12" - 14" length of cage-front intact, in case you decide to use a J-feeder. (They'll cut down on your rabbit care time, because you won't have to open the door of every rabbit cage to feed, but they're definitely not essential--crocks work just fine, or other container that won't easily tip over.)
11) Attach the rabbit cage door with J-clips: Two at the very top bumping each other (to help keep the door positioned without sagging), a couple in the middle, and one or two clips at the bottom.
12) Attach the latch to the door with J-Clips. There are a number of great latching systems, each designed a bit differently, but getting the job done well.
13) If you decide to use
J-feeders, now is the time to cut a 12" x 2" hole in the front of the
cage, 2 inches off the floor. The feeder will hang on the outside of
the cage, and deliver the feed to the rabbit (and bunnies) on the
inside.
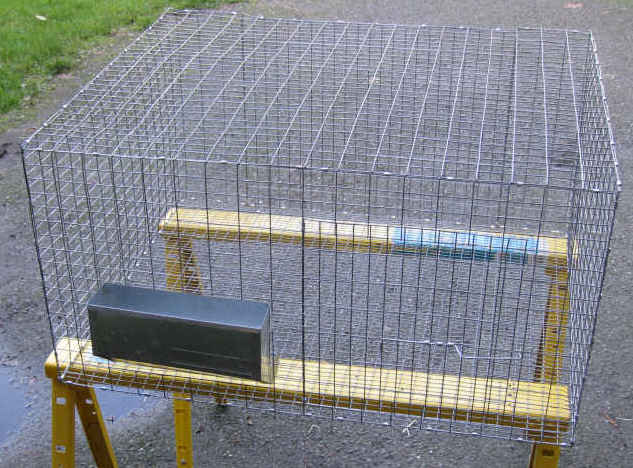
Congratulations. In an hour or less, you followed these rabbit cage plans and made your own homemade rabbit cage.
Not everyone feels like building their own rabbit cages.
We think we get the most value for our money by building our own cages with our rabbit cage plans and we think you will too.
But we understand that some folks may prefer to save time and effort by purchasing their cages ready-made. You'll find some truly top-quality ones in our Raising-Rabbits Store.
Click here for full information about our cage manufacturer: Hostile Hare.
Where can I find top quality rabbit cages that are great for rabbit feet?
From Raising-Rabbits, of course!
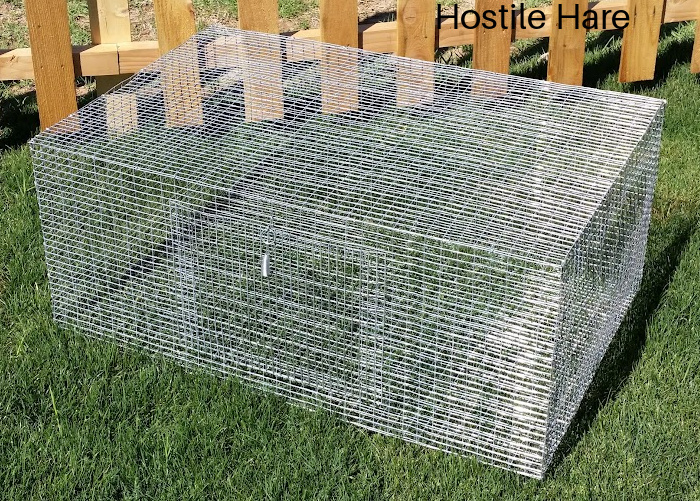
Raising-Rabbits has partnered with Hostile Hare to bring you cages that exceed our rigorous rabbit housing standards.
We do not manufacture cages, but we sure recognize a well-built, predator-proof, baby-safe, bunny-feet-safe cage when we see it! We think Hostile Hare cages will serve you well for years.
Explore the choices by clicking the logo or this link!
Raising rabbits? Consider a membership to the American Rabbit Breeders Association
Double-Value Guarantee
Our policy is to always OVER-deliver
on value,
which is why your purchase is fully covered by our
Double-Value
Guarantee.
Go ahead - take any of our e-books for a test drive. Peruse our detailed informational and educational e-books. Examine our plans for building rabbit cages, runs, or metal or PVC hutch frames. Check out the Rabbit Husbandry info e-books.
If you aren't completely satisfied that your e-book purchase is worth at least double, triple or even quadruple the price you paid, just drop us a note within 45 days, and we'll refund you the entire cost. That's our Double-Value Guarantee.
Note: When you purchase your
e-books, they will be in PDF format, so you can download them to any device that
supports PDF format. We advise making a back-up copy to a drive or cloud
account. If the books are lost, you can also purchase another copy from Raising-Rabbits.







New! Comments
Have your say about what you just read! Leave me a comment in the box below.